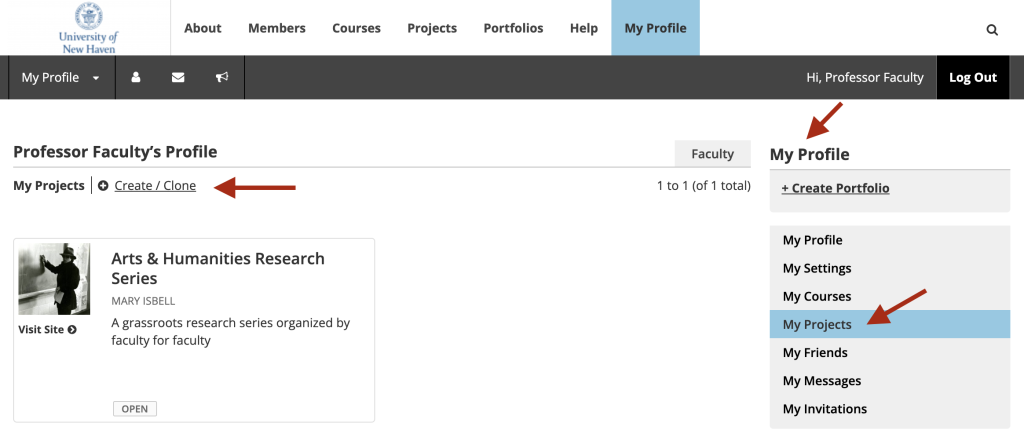
1. After logging in, click My Profile in the main menu. Then click My Projects on the right-hand menu. On the My Projects page, click + Create a Project at the top of the page.
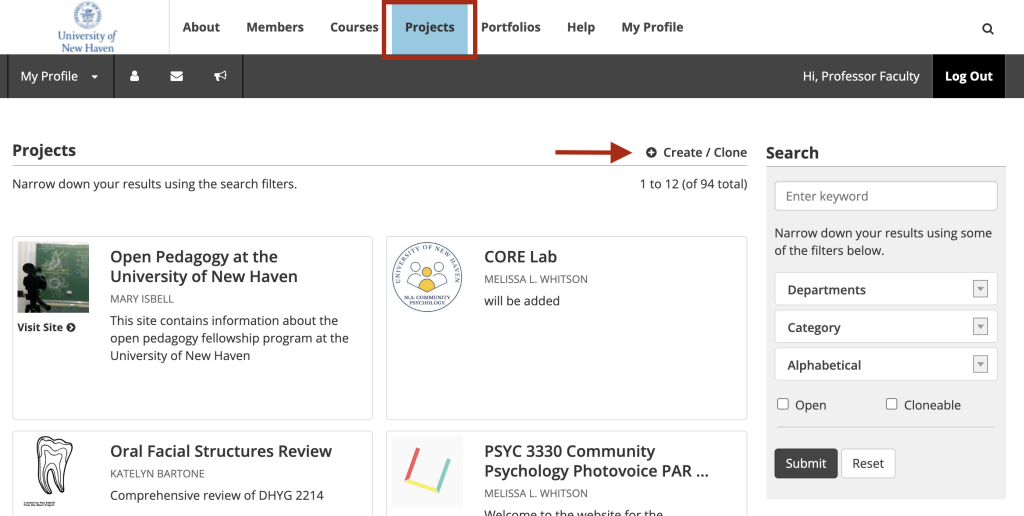
b. Or, go to My Profile in the main menu. Then click My Projects in the right-hand menu. At the top of the page, click + Create / Clone.
Step One: Project Creation
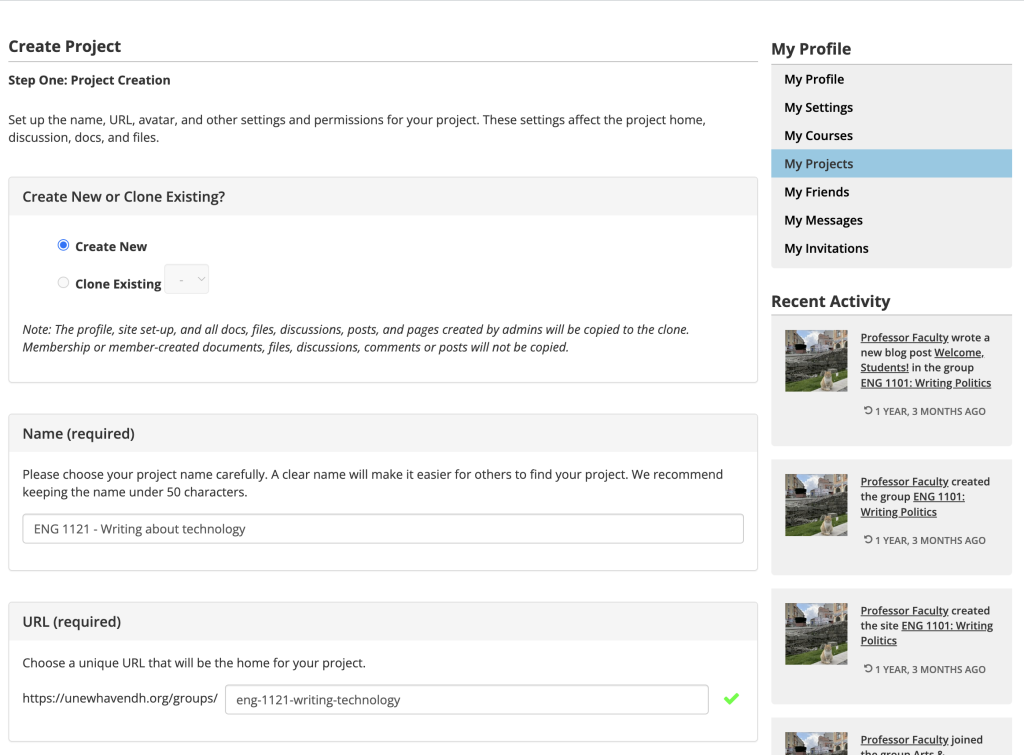
1. On the project creation page, you can either choose to create a new project or clone an existing project. Cloning will create an exact copy of an existing project, keeping all content you created or uploaded, but member work will not be copied over. The project avatar, project settings, and site settings will all remain the same, although you can change anything as necessary. View instructions on cloning a project or continue below for creating a new project.
2. The Create New radio button should be chosen by default. If not, choose it.
3. Choose the name for your project. This name will also be used to create the URL for the Project Home. When you tab to or click the URL field, it will be automatically populated, based on the project name.
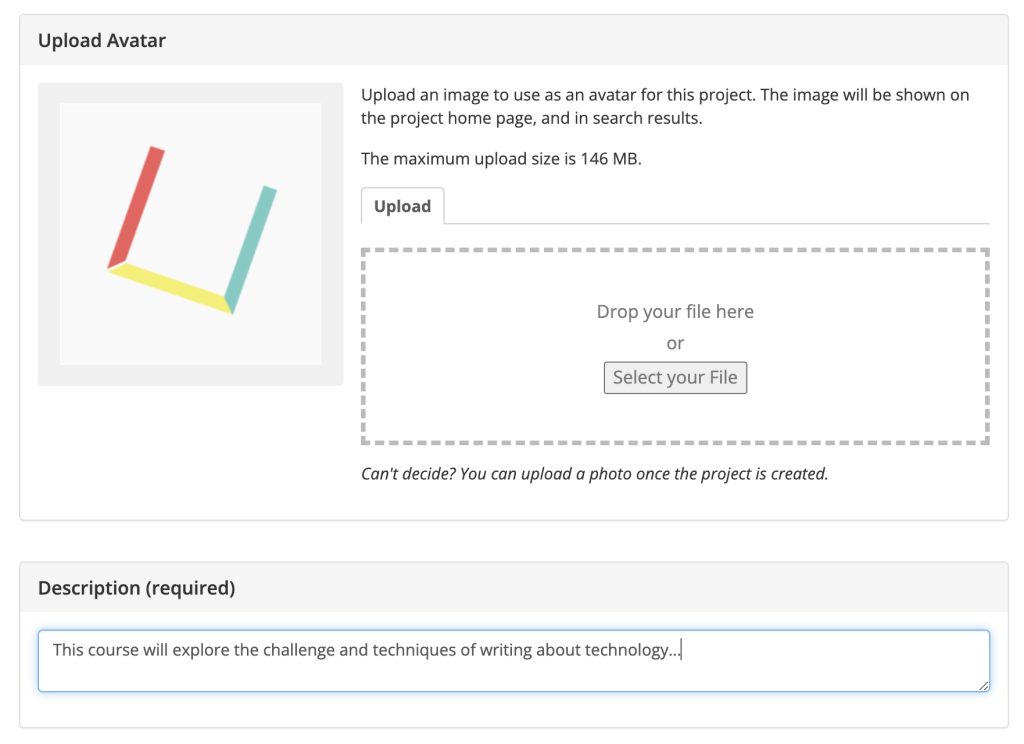
4. You can upload an avatar that reflects the subject or topic of your project, but this is not required. If you have an image file ready that you would like to use as your avatar, drag it into the Upload box, or click Select your File. If you don’t have an image now, you can always add one later.
5. Add a required description for your project. You can always add to or change this later.
5. Select your sharing settings – enabling shared cloning allows other members to be able to clone your project, allowing them to reuse, remix, transform, and build upon the material in this project.
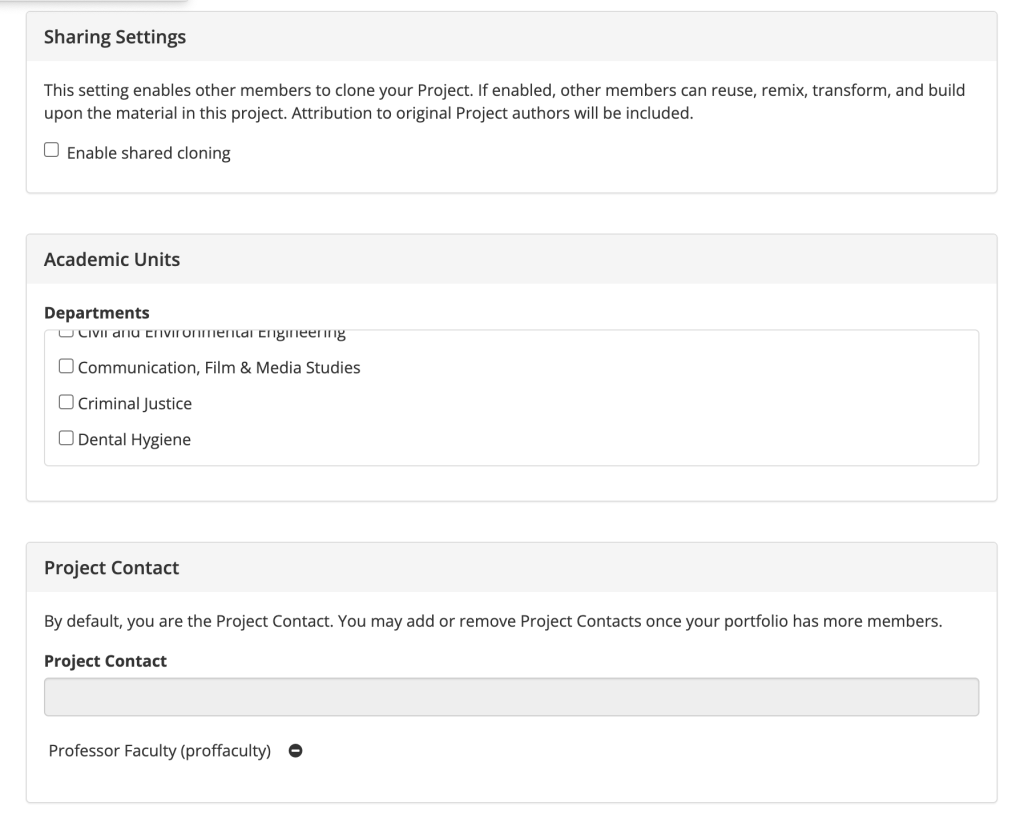
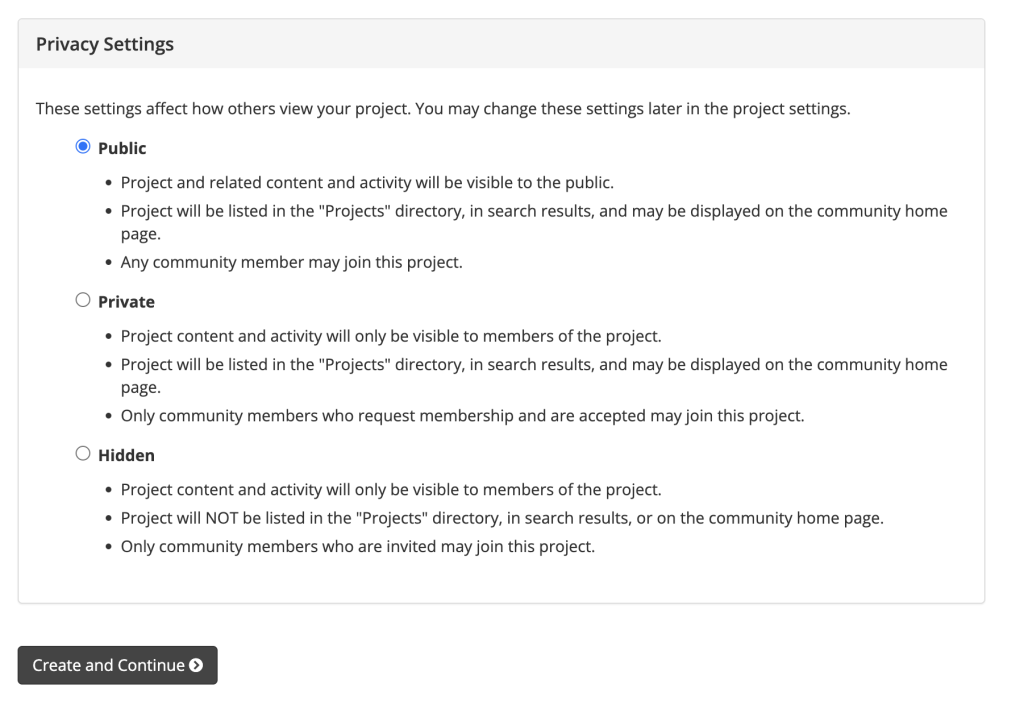
6. Finally, choose the privacy settings for your project, then click Create and Continue.
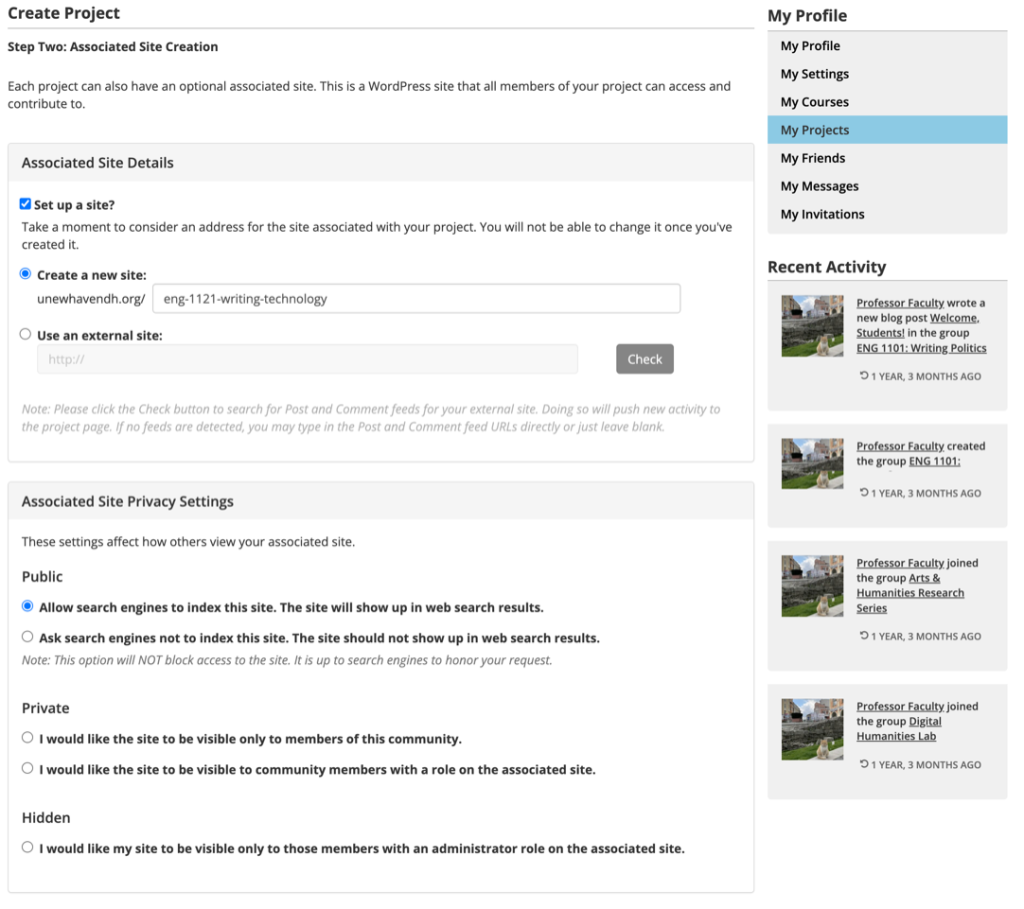
Step Two: Associated Site Creation
1. Creating a project will also create an associated WordPress site. The URL, or web address, is what you see in the location bar of your browser. This will be automatically filled in, based on what you choose for the project name, but you can change this.
If you have an existing OpenLab site that is not already linked to another course, project, or portfolio, you can choose to Use an existing site for your project. Please note: This option will not appear if you do not have an unlinked existing site.
If you have an existing site that is not on the OpenLab, you can choose to use an external site for your project.
2. Choose the privacy settings for the project site.
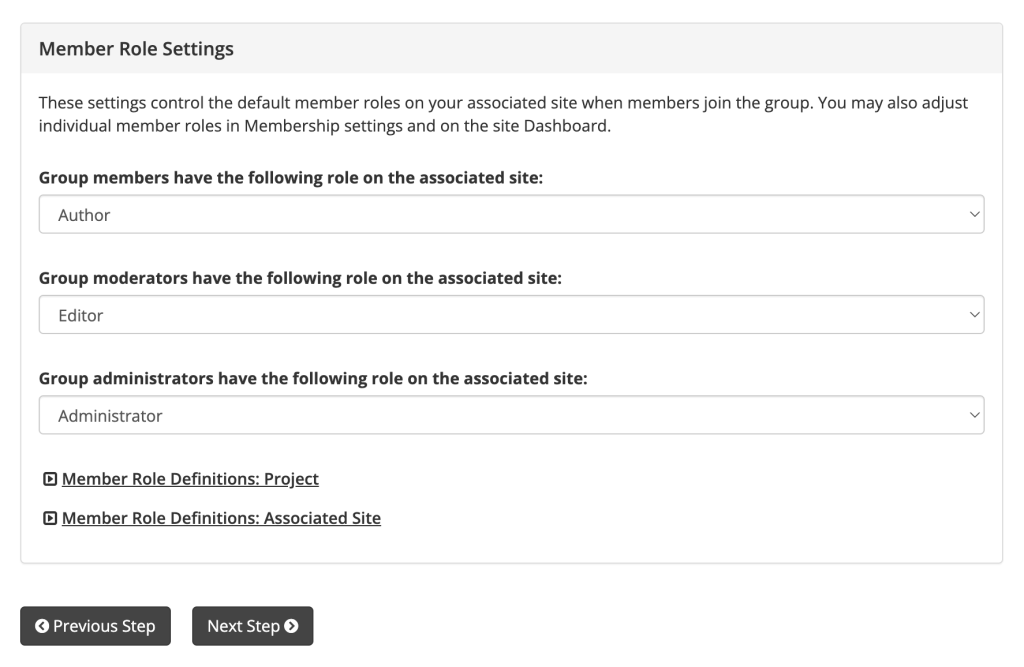
3. Last are Member Role Settings. These settings determine what roles members will have on the associated site when new members join.
For most projects, you will want to leave the settings as they are. You can also make changes to individual member roles in Membership settings and on the site Dashboard.
To change the role associated with a member, moderator, or administrator, choose the site role you want from the associated dropdown. You can find out more about each type of role by clicking on the Member Role and Site Member Role Definitions links. Click Next Step at the bottom of the page.
Step 3: Invite Members
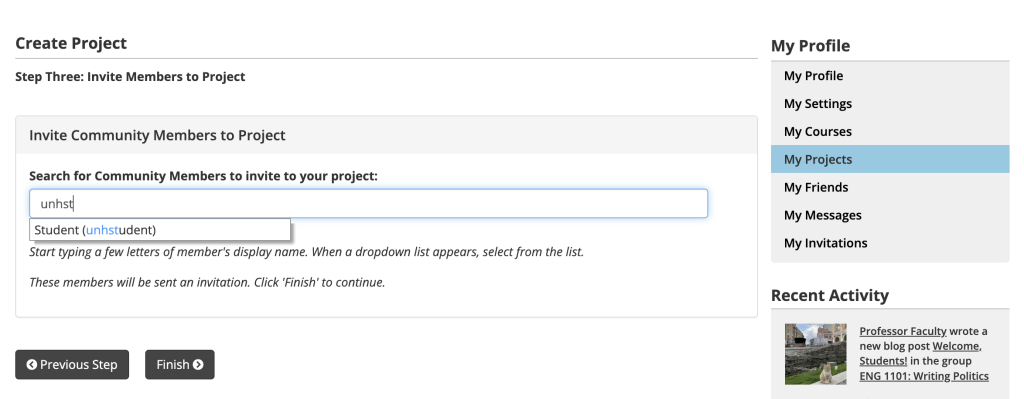
- If you would like to invite members to your project, start typing their display name. When a dropdown list appears, select their name from the list. Their name and avatar will appear under the heading Invites. When you’re finished, or if you do not wish to invite anyone at this time (you can always do it later!), click Finish, at the bottom of the page.
That’s it – you’re finished! You will now be on the Project Home. From here, you can change settings such as privacy, the project description, or the avatar. From the Project Home you can also access your Project Site and Dashboard (the admin panel, where you will edit and add content to your Project Site).
This article is adapted from City Tech OpenLab Help, under a CC BY-NC-SA license.