Creating your account
To create your account visit, https://unewhavendh.org/ and select sign up .
After one of these options is selected, you will proceed with creating your account; your page will look similar to the image below.

PLEASE TAKE NOTE OF YOUR USERNAME AND PASSWORD!
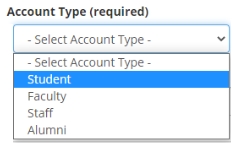
After completing the account details above, you will then complete the public profile details and select whether you are a student, faculty, staff or alumni
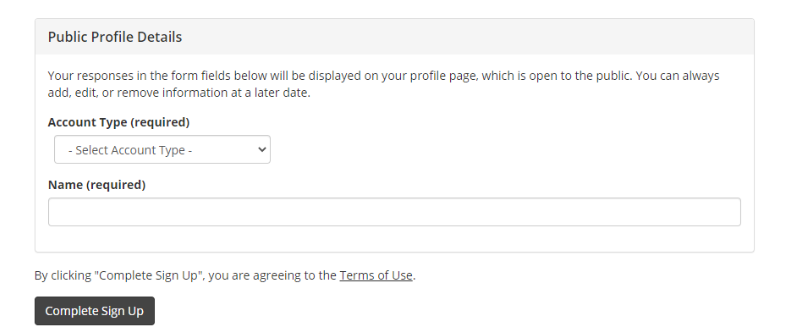
After completing all required fields select Complete Sign Up
If your sign up was successful, you will receive a message with the subject; Sign Up Complete

You will then check your email for the account activation link. If this message does not appear in your Inbox, check your Junk mail.
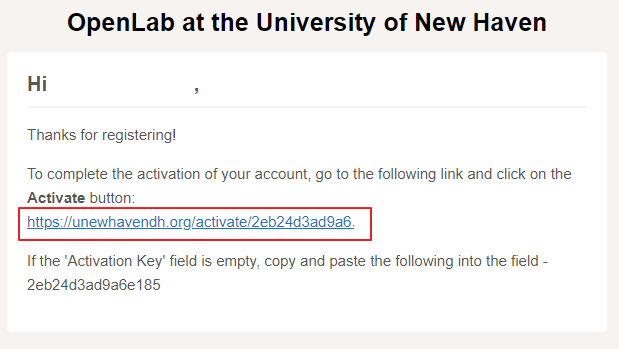
After selecting the link, you will be required to provide an activation key which is located below the link in the activation email sent to you.

Creating your project/course/portfolio through OpenLab
After creating your account, you can proceed with creating a project, course or portfolio through WordPress. Visit https://unewhavendh.org/, and on the homepage; Courses, Projects and Portfolios will be displayed. Select the option which best suits, an image with these options is displayed below.
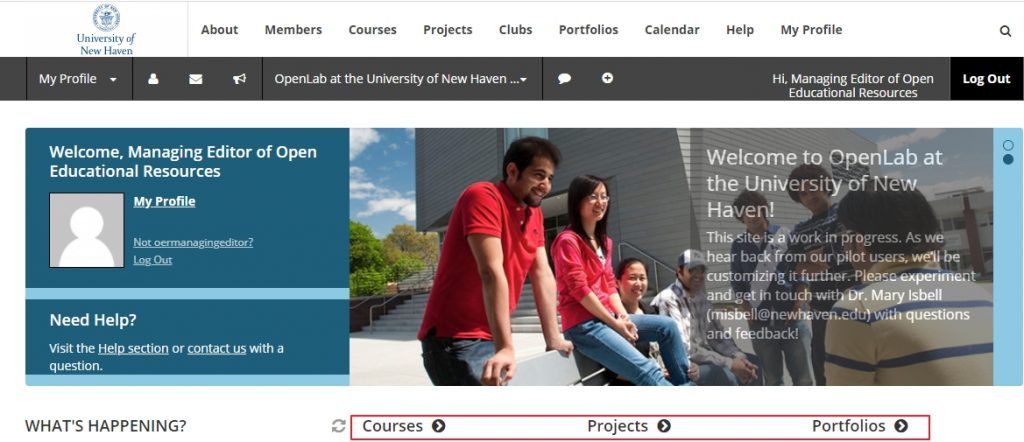

After selecting one of these options, you will be brought to the project/course/portfolio creation page, which is displayed below.

Select Create/Clone which is located in the top right corner to begin creating, or to clone a course/project/portfolio which was previously created. If clone is selected, a drop-down menu with pages previously created will be displayed. If a new project/course/portfolio is being created, a name and unique URL would be required. The name which is selected is usually associated with your future URL. A visual representation of this is displayed below.

It will then be optional to upload an avatar for your project/course/portfolio, but a detailed description will be required. This description will briefly explain what your WordPress site will be about.

After this is completed, you will select your sharing settings, select the academic association of your site (if any), add project contacts and indicate your category. (faculty, staff, student etc.)


After this section of your site creation is completed, you will then select its privacy setting. (this can be changed at any time) Please ensure that you recheck your site settings. After this is completed just click Create and Continue which is located in the bottom left corner.

Video/Steps Request Form
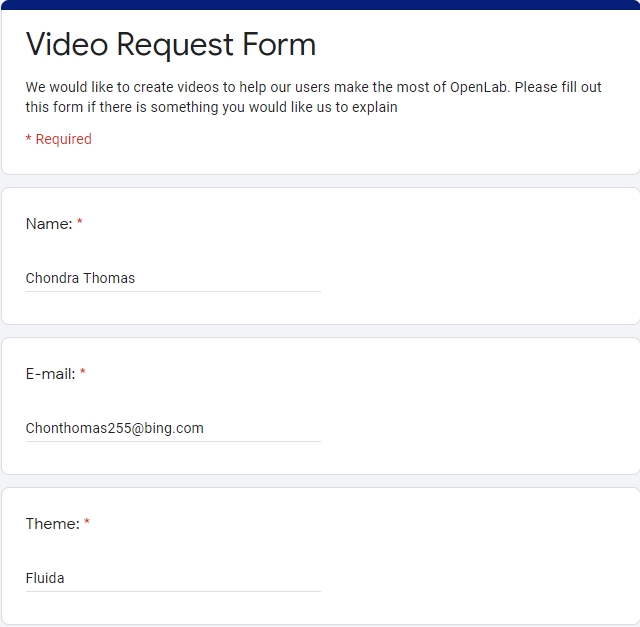
WordPress can become complicated at times for some users and we want to help. If there is anything you need help with, you can submit a video request form and we will address your issue as best as we can with a video or step by step response. To make a request just click the image below and you will be directed to the video request form. We will respond to you within 3 – 5 business days of your request. We ask that you be as detailed as possible when explaining your issue; help us, help you.
Tips for beginning WordPress
WITH PATIENCE, PRACTICE, AND INNOVATION; A WORLD OF POSSIBILITIES REST AT YOUR FINGERTIPS
From your web browser, WordPress allows you to create and manage a website without the use of coding. You will be surprised by how the simple skills that we use to create a word document, with a hint of imagination, and a bit of dedication, can turn our ideas into life. With technology and social media growing rapidly, a website would be a great medium to channel our ideas. This website will help with a few minor tips for kickstarting your website, but there are many more resources available to help. From Openlab at City Tech, WordPress Support, Youtube, and other websites, there are many ways to obtain customizing ideas when creating your site. This website is mainly based on the Liquido theme, however; the general setup of your site which includes the theme, pages, homepage, and menu very similar regardless of the theme selected. We are encouraging you to explore the plethora of outside webpages, videos, and information to help.
Before beginning head over to your dashboard, your dashboard will be your best friend. To do so, from the extreme top bar that includes My profile and Log Out highlight your page title, then select DASHBOARD. This is displayed in the image directly below where the page title is Test.
Note: This depends on the page you are on, at times when the title is highlighted the only option that will be present is visit site.  Select visit site, then repeat the first step ( highlight your Page Title, then select Dashboard) then continue with the steps below.

Below is an image of what your dashboard will look like. Under More Actions select Learn more about getting started, here you will get a more in-depth understanding of WordPress from its creators.

Like you, we are still learning, but here are a few kickstarting steps to consider:
1. ADD A THEME:
Begin by selecting and enabling a theme, that will formulate the appearance and structure of your website. There are a variety of themes to choose from, depending on the designer’s preference.
2. ADD A PAGE:
Pages create substance on your website where information can be posted to your liking and then viewed by those accessing the website.
3. ADD A HOMEPAGE:
One of these pages can be set as your homepage that can be either static or it can display your latest posts.
4. ADD A MENU:
The best way to keep your website in order, and for your users to navigate the website efficiently is to create a menu. Menus are linked to the different pages either in the form of main or submenus.
IT WILL SEEM A BIT CHALLENGING IN THE BEGINNING, BUT REMEMBER; BE PATIENT, PRACTICE AND IMPROVISE!
Adding a theme
Selecting a theme is usually one of the first steps in creating your website. Your theme adds the appearance, style, and layout to your website.
From your main site page, highlight the title of your page in the top bar and then select Dashboard; this is highlighted in red below. After selecting dashboard, you will be directed to your site customization page captioned in the smaller image below. Under Customize Your Site, you will see change your theme completely, that you will then select.

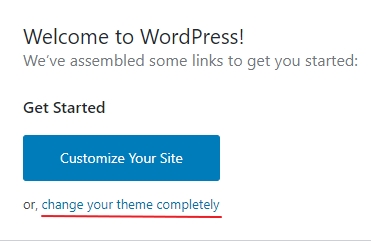
After selecting change your theme completely you will then be able to view the different themes that can be applied to your website.
Apart from the themes that we provide access to, a wider variety is available and can be made accessible upon request; these themes can be viewed at https://wordpress.org/themes/. To request a theme, please fill out and submit a theme request form here, an example of this is displayed below. After this theme is requested, a response will be given with 2-3 business days. We cannot guarantee that we can make the theme requested available but we will try our best.

When your desired theme becomes available, you can continue with adding it to your site. The steps to do so are as follows:
Select Live Preview to view a theme before applying it to your website. Before previewing the theme, you can highlight it and select theme details to get specifics on a theme and obtain insight into what it is best used for.
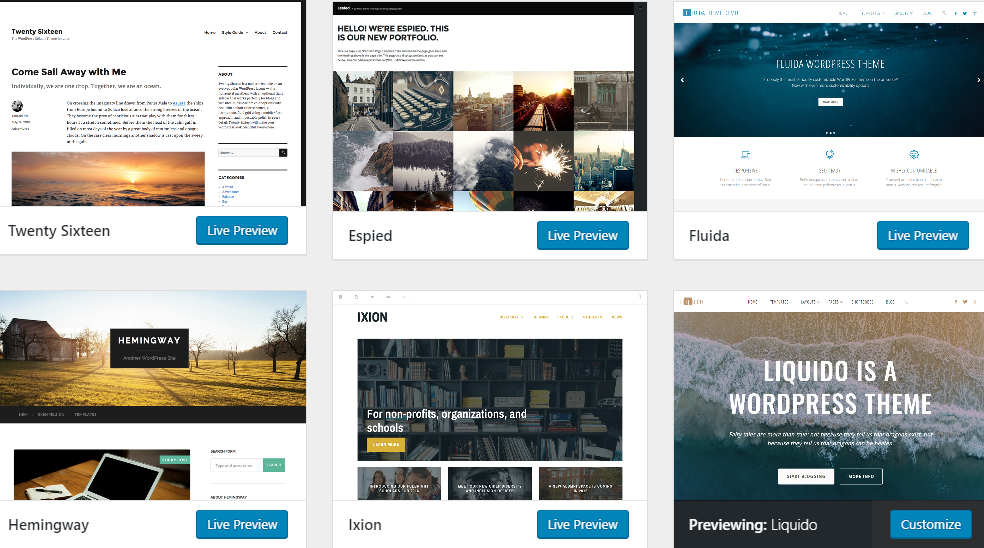
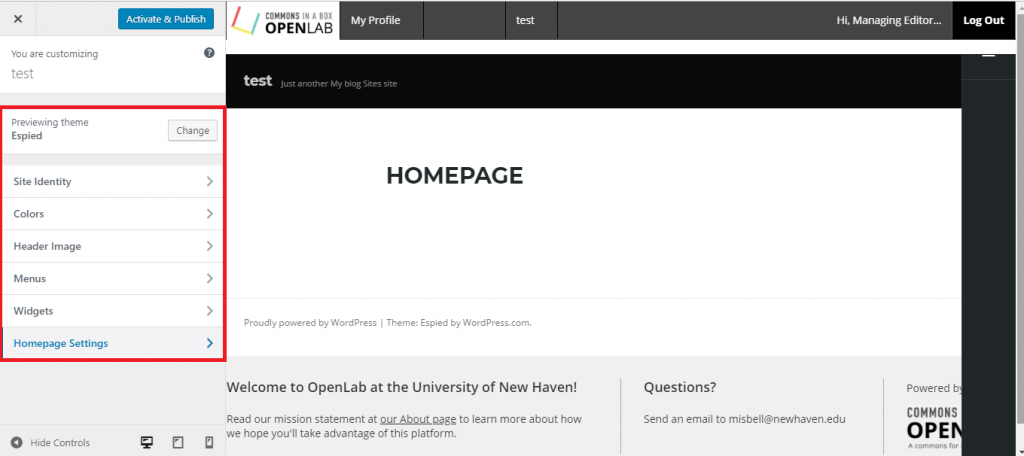
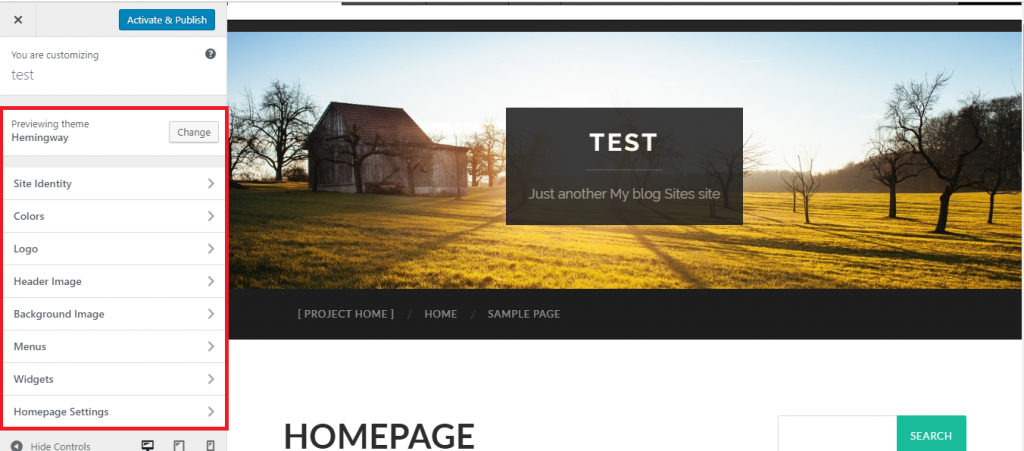
Here are some examples of the different themes that can be applied to your site. (The active theme name changes for each image.) Select the theme image below to be directed to its specific page or click the collage image above to be redirected to the WordPress themes directory page.
As you can see from the theme-specific customization bar highlighted above, each theme comes with different customization options. After finding the theme that best suits your page, select ![]() to apply it to your site.
to apply it to your site.
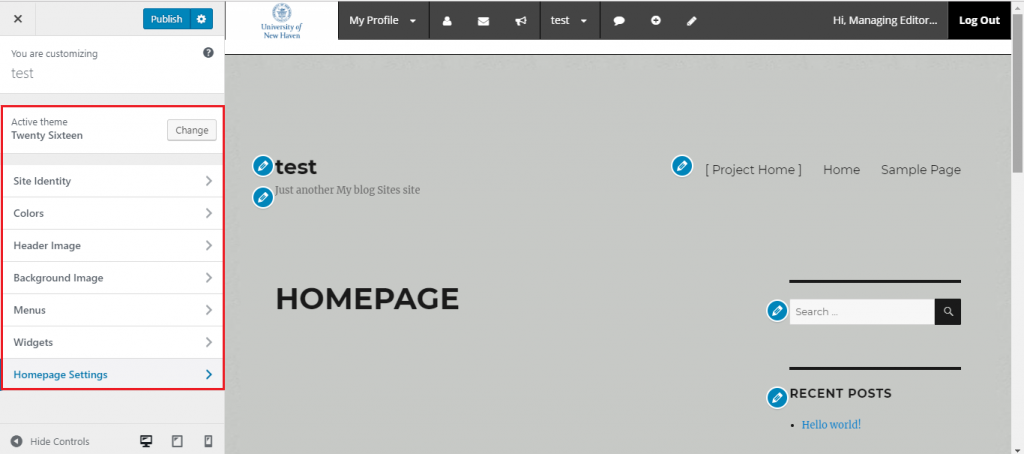
WordPress incorporates a theme-specific customization sidebar and a general customization sidebar that can both be used to customize your website. As you learn more and continue to explore, you will better understand how each can be used interchangeably.
Now that your theme is added, let’s try ADDING A PAGE
Adding a page
Adding a page is simple, quick and easy. From the extreme top bar that includes My profile and Log Out highlight your Page Title, then select Dashboard.

Note: This depends on the page you are on, at times when the title is highlighted the only option that will be present is visit site.  Select visit site, then repeat the first step ( highlight your Page Title, then select Dashboard) then continue with the steps below.
The dashboard will be displayed similarly to the image below. To add your page, select the page icon from the general customization bar, or just select Add additional pages, both options are highlighted in red below. WordPress has a general customization sidebar and a theme-specific customization sidebar but this will be further explained at the customization bar menu.

Select the Page Icon ![]() then Add New
then Add New

Add your page title.

After adding your page title, proceed to add the information to your page. After the information is added, you can either Save Draft or Publish. By saving your information as a draft it will be saved for future editing without it being posted to your site. Once final edits are made, you are ready to publish this page to your site which allows viewing from your users.

Your page should be created; you can follow these steps again to create another page or head over to the CREATING A MENU page that will help with organizing your different pages in a menu format. Before these menu instructions are explained, the next page will show how to turn one of these pages into your homepage.
If your sample page is still present, you can select all pages and you will be able to delete it from here; that is if there are no plans of using it.
Adding a homepage
When creating your home page there are two options that can be used, either a STATIC homepage or LATEST POST homepage. These options are self-explanatory, the static page usually has the same display unless changed by the designer, while the latest post will just show your most recent posts, similar to a blog.
The latest posts can either be on the homepage or users can be diverted to another page from a menu tab that displays your latest posts. (mini blog page) An instructor with a class that checks online for weekly updates ( notes, readings, etc.) might decide to use the latest posts homepage so that current information is easily located. Another instructor might decide to use the static homepage with menus entitled week 1, week 2, week 3…, where the information is displayed; it’s all up to you. There are two ways in which your home page can be created these two options will be explained thoroughly below.
OPTION 1:
head over to the dashboard, and select ‘Customize Your Site,’ highlighted in red below.

Select homepage settings, from the theme-specific customization sidebar and select whether you want your homepage to be static or display your latest posts. Pages that you have created will be displayed in the dropdown menu under homepage, just select the one which will be used as your homepage. If you are yet to add a page, step by step instructions are given over at the ADDING A PAGE menu.
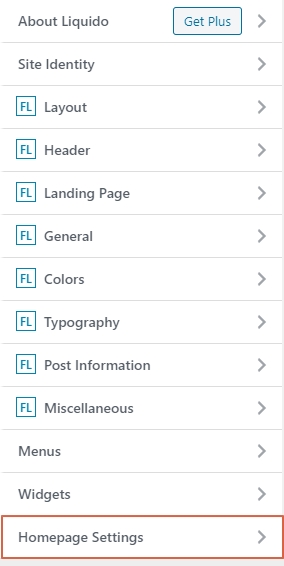
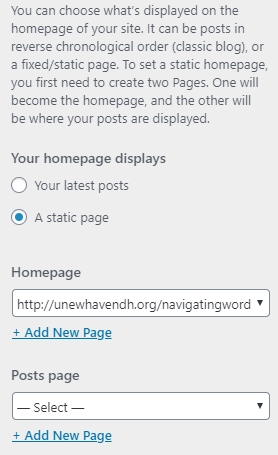
The option is also given to have a separate post page from your homepage. Select your desired page from the dropdown menu under Posts page and from here your user will be available to view your latest posts. Remember to continuously update your page while edits are being made and then select publish when you are finished.
OPTION 2:
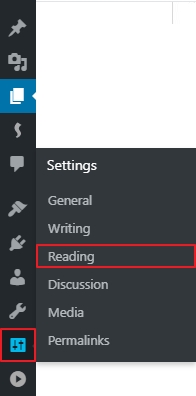
Head over to your dashboard, and to the extreme left of your page will be your general customization bar, select the setting icon then select reading; both are highlighted in red below.
After reading is selected, your page will look similar to the image below.
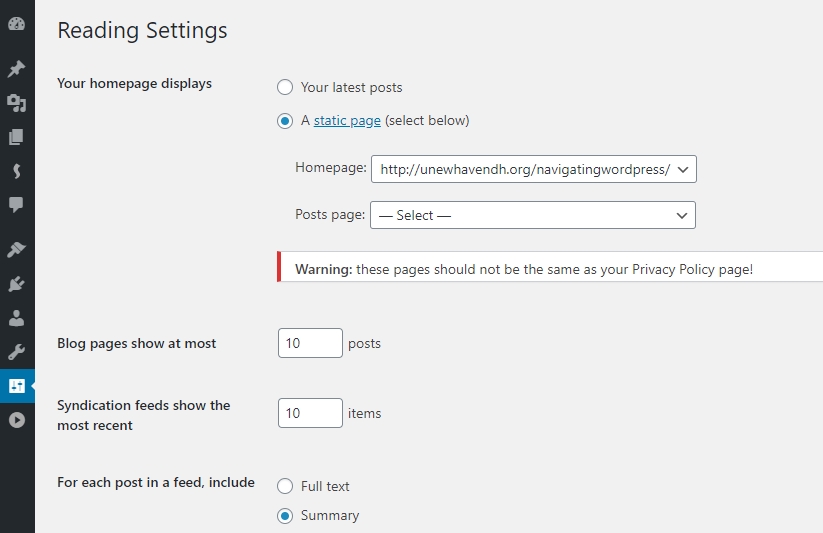
Here you are able to change your homepage display to either your latest post or a static page. Use the drop-down menu to select which of the pages that you created will be your home page and if needed which of these pages will be your post page; your mini-blog, within your site. If you are yet to add a page, step by step instruction is given over at the ADDING A PAGE menu. Update or Publish when you are done.
Adding a menu
Now that your pages have been added, creating a menu will aid in organizing these pages and help your users to efficiently navigate the information on your site. Head over to the dashboard and select Customize Your Site
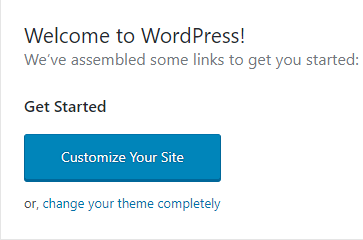
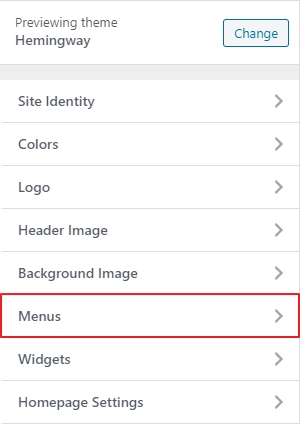
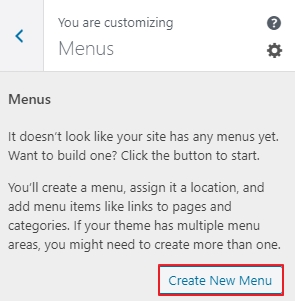
Select Menus, and here you will have the option to either edit your main menu or create a new menu. Your main menu usually appears at the top of your page (depending on your theme) and this is where your user usually checks first to navigate the site. Select Menus then Create New Menu (These steps are illustrated below)
After selecting create new menu, the page you will be brought to is displayed below. Add your Menu Name and decide on your Menu location whether you want this to your Primary Menu or not. The primary menu is usually located to the extreme top of your page
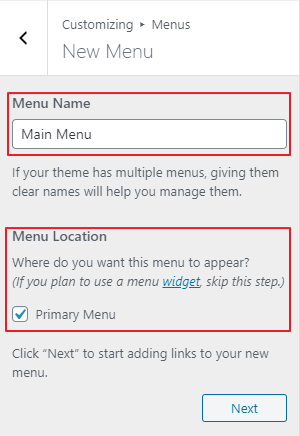
Press Next and then Add Items; see in the image below
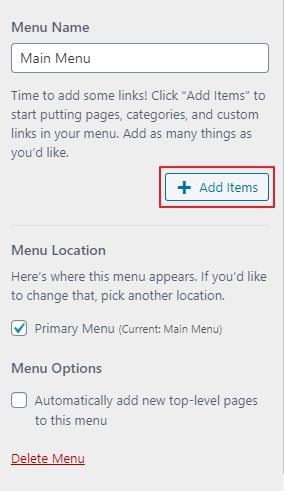
The items that you will be able to add to your menu, are from pages previously made. I previously created my Circulatory system, Nervous System, Respiratory System, SYSTEMS OF THE BODY, Digestive System, Pollination, Water Cycle, Bio and Presentations page.
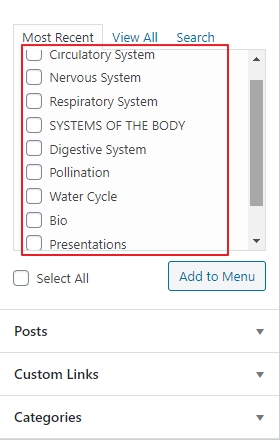
Select the pages that you want to be added to your menu, then click Add to Menu. You have the option to drag and re-order the pages to change how they will be arranged on your menu. (You can delete the sample page from your menu by clicking page that will display a drop-down menu and then the option to remove this page will be displayed)

When you are done, select ![]() then
then ![]() that appears to the right of your page.
that appears to the right of your page.
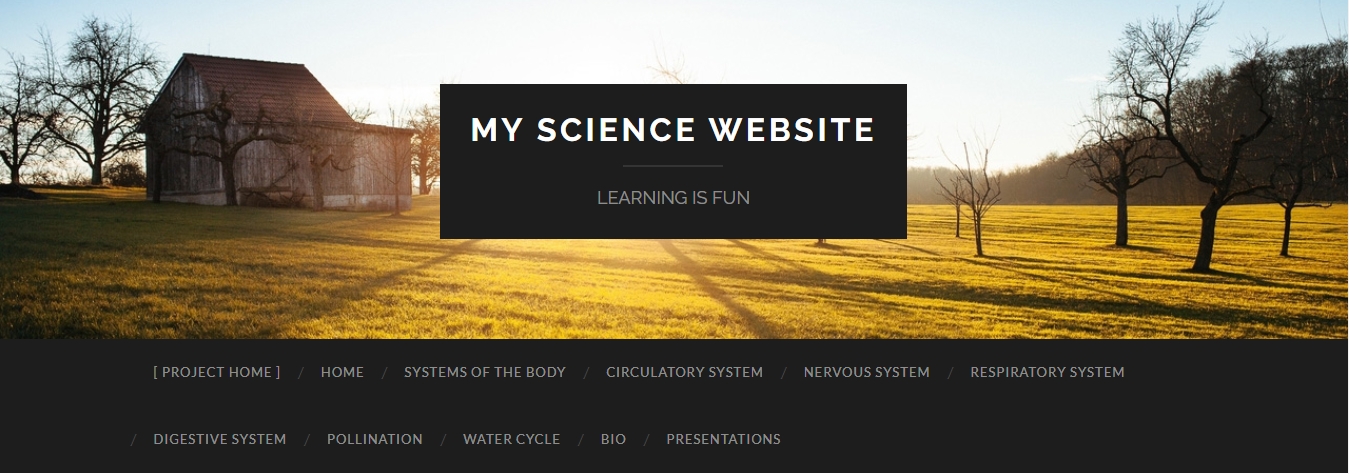
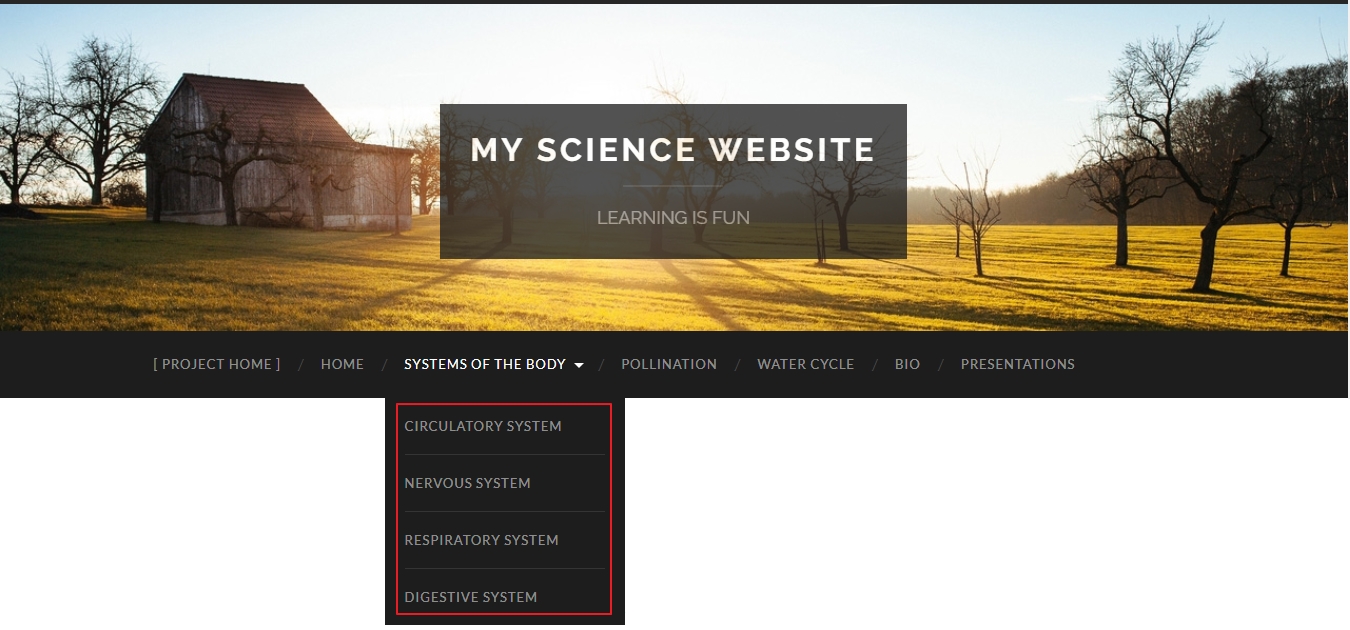
Below is an example of how your main menu would look after adding your pages and removing the sample page. The Home option usually appears on your menu (might not need to create your own), but this depends on your theme. The HOME option sends you back to your main page.
Lets add a sub-menu
Head back over to the menu page then add the page you want to be displayed as a sub-menu to your current menu. In this case, I would like my sub-menu page to be displayed as a sub of my menu page. To do so, I will drag the sub-menu item under the MENU item. (see image below)
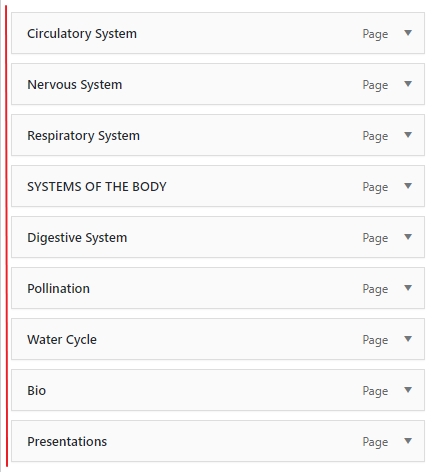
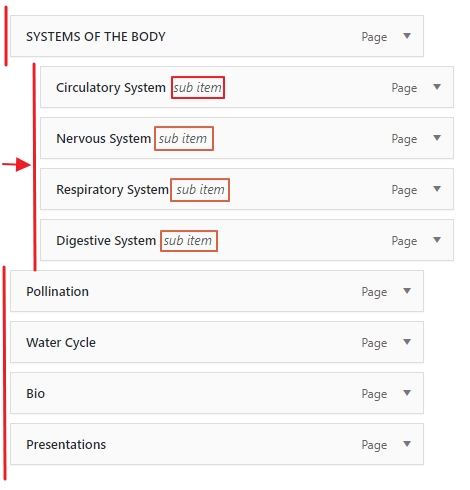
After adding your pages to the menu list and dragging it under the page which will it be a sub of, DRAG IT TO THE RIGHT UNTIL THE PAGE IS INDENTED. When it is indented, the word sub-item will appear beside the page name. (see image below) You can repeat this step to add as many sub-items as needed.
When you are done, press ![]() which appears to the right.
which appears to the right.
Your drop-down/submenu should be added.
Navigating the customization bar
There are two main customization bars that come with all themes, the general customization bar, and the theme-specific customization bar. These customization bars are the places to add, delete, and modify everything from menus to pages and from widgets to backgrounds. The general customization bar remains similar regardless of the theme being used, while the theme-specific customization bar changes with your selected theme. Below is an image of the general bar.

The general customization bar is usually present to the extreme left of your page when the dashboard is visited or edits are being made, regardless of your theme. The layout of this bar is similar for most themes and from here the tools required to customize your website are readily available and quickly accessible. The general customization bar displays a small range of icons that can then be used to locate customization settings.
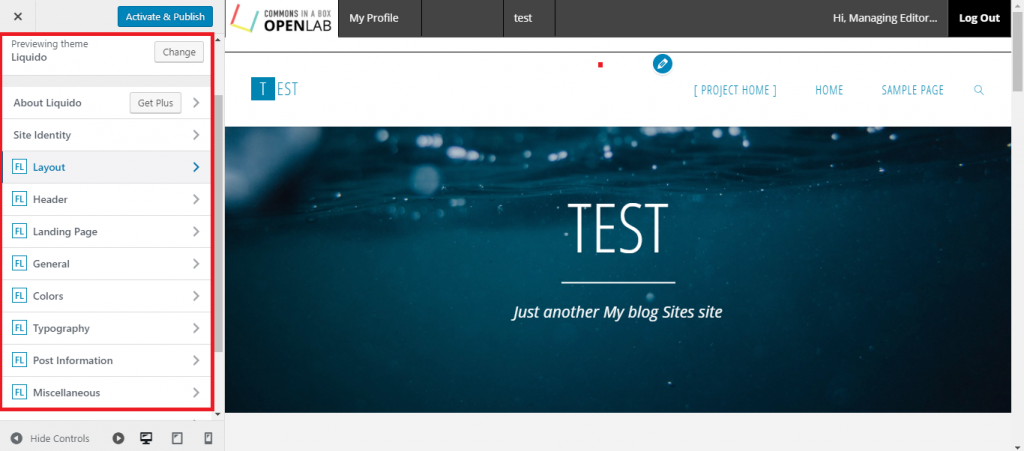
Below are images of theme-specific customization sidebars, for the Liquido theme and the Twenty Sixteen theme respectively
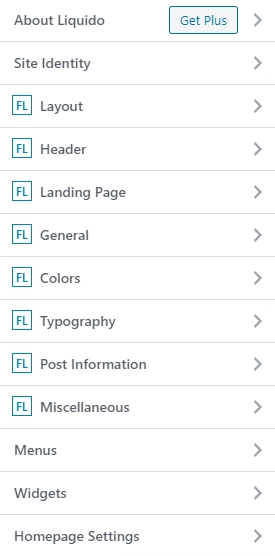
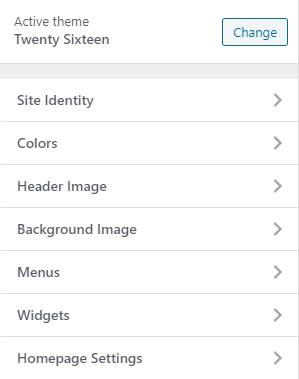
The theme associated customization bar offers theme-specific customization, which helps to create and fine-tune your website to your liking. The general customization bar allows you to locate the settings needed, but this becomes much easier when using the theme-specific bar. This is a simpler compass to navigate your site, with straightforward customization options. Instead of a small range of icons, the different options available are broken down into words and are much more detailed. This might be easier when you are just beginning your WordPress journey. The general customization bar might be easier for some, again it is all up to you.
Site Identity
From your theme associated customization menu, you will locate the site identity option. This is where you make your website yours. You are able to change your background and site identity as displayed in the captioned image below.
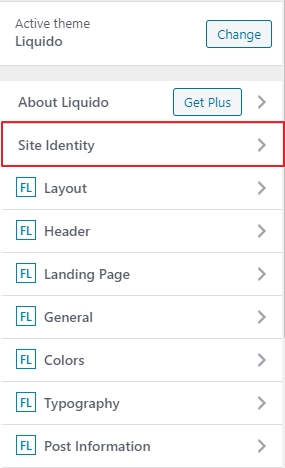
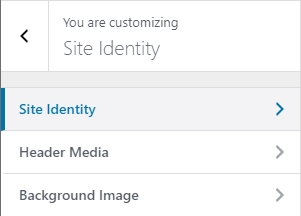
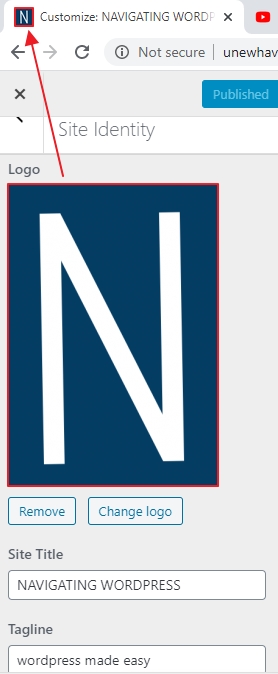
When site identity is selected, you will then be led to the image shown below. From here you will be able to insert your site logo, site background, and site tagline. The logo is shown as your tab icon, while the site title and site tagline is usually displayed on your homepage depending on your theme.
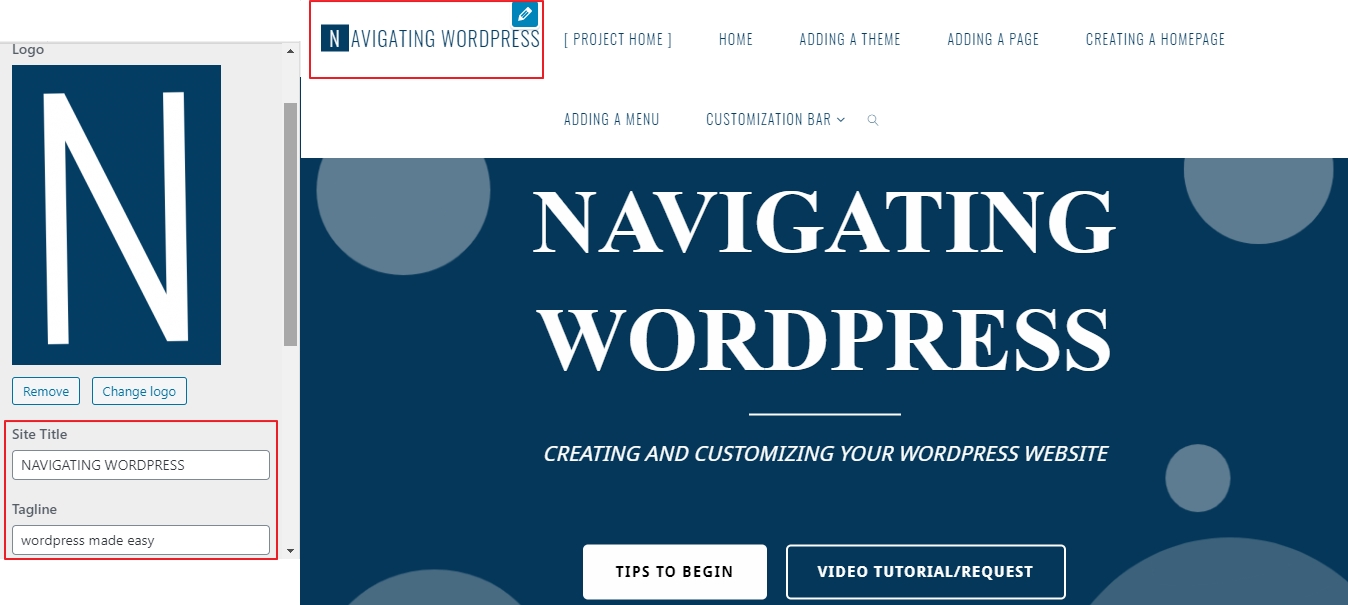
Below is an example of how the Site Title and Tagline appears when using the Hemingway theme. The image behind the Site Title and Tagline is the page’s header.

Below is an example of where the Site Title appears when using the Liquido theme, as you can see, the site tagline is not visible. With this theme, the main page edits are made from the serious slider menu customization option; to visit this page click here.
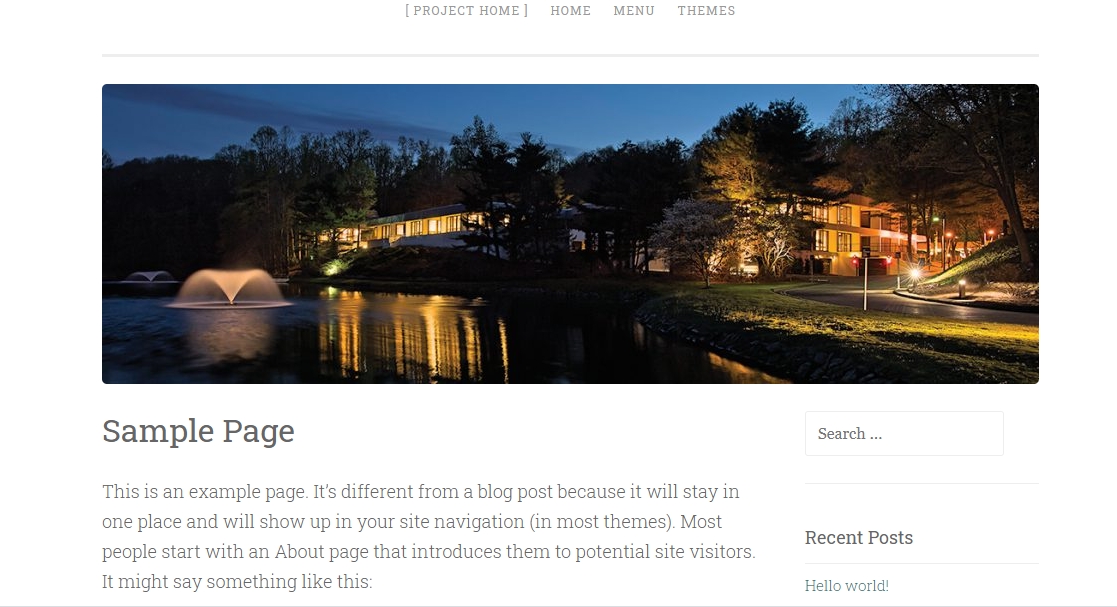
Another selection that can be made under site identity is your header media. Any image can be selected as the header of your page and this will appear at the very top of your website. This depends on your theme, headers are not visible with all themes. Your header image can be selected from a list that WordPress provides or it can be uploaded from your media library or the device being used.

Below is an image of the Penscratch theme with a header added.
The other selection that can be made is your website background, which is easily added, removed or changed from here. Your site background does not always appear on your front page but sometimes appears as the background image of your site pages. Your theme selection makes the difference here.
The typical layout of a site will be related to the theme but your header image, site logo, and background are unique to you! Be creative; make your website yours!
Creating a post
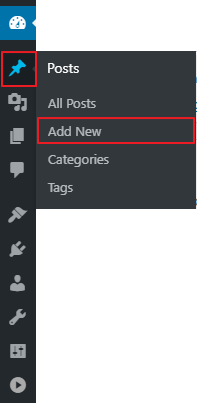
To create a post, head over to the dashboard and from the left customization sidebar select the post icon ![]() then select Add New
then select Add New

OR
Select the post icon ![]() then select Add New at the top of the page; see the image below.
then select Add New at the top of the page; see the image below.

After selecting Add New, your page will look similar to the image below. Here you will be able to add your post title and post information

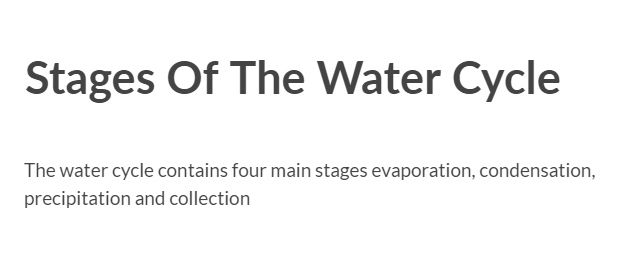
Here is a sample post:
Your homepage can either be set display latest posts, or it can be a static display. To change these settings go to the dashboard, then in the left customization bar highlight the settings icon ![]() ,then select reading, these steps are shown below.
,then select reading, these steps are shown below.


After selecting reading, your page will look similar to the image below; depending on your theme.
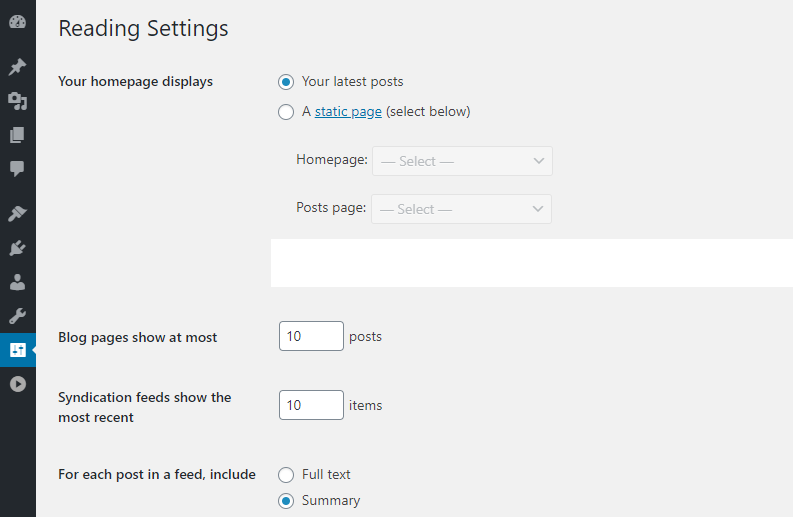
If you select that your homepage should display your latest posts: ![]()
- When using the the Hemingway theme , it will change from:
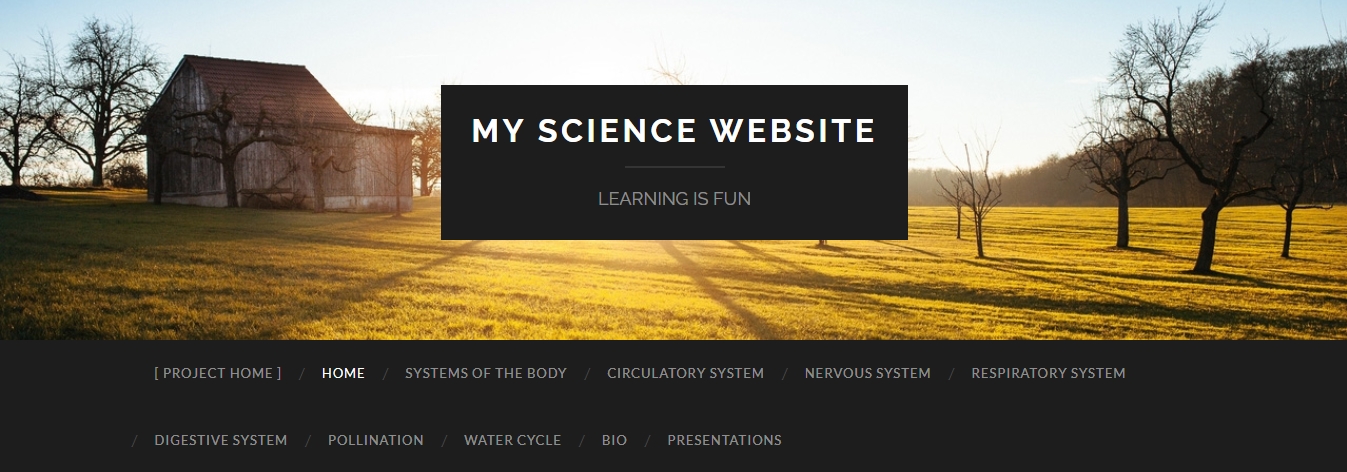
TO THIS:
OR
- When using the liquido theme, it will change from:

TO THIS:

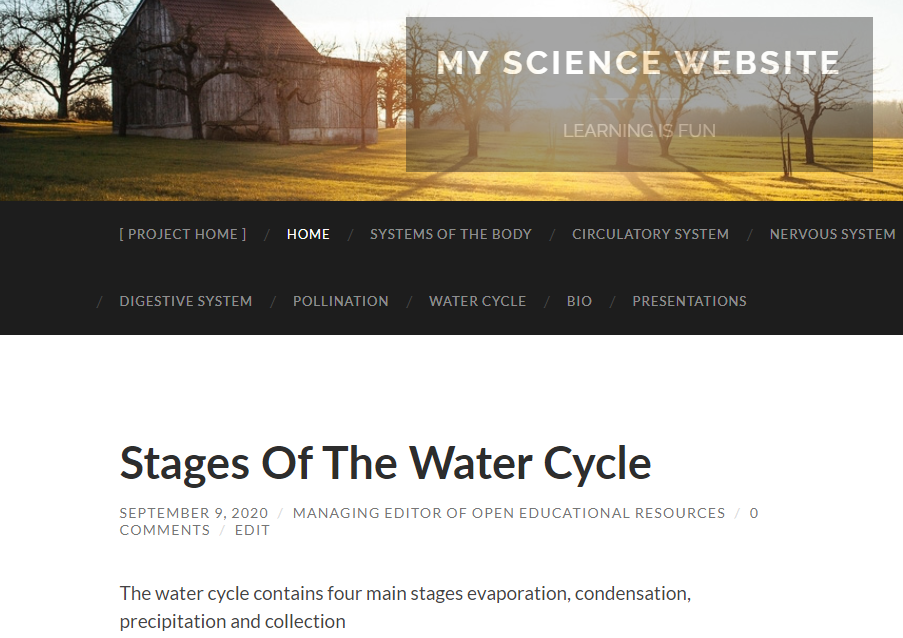
As shown above, the homepage image of liquido theme was changed to the latest post, while for the Hemingway theme, the post was added below the header image.
Homepage images will be changed to the latest posts added on your page (whether this post was made by you or another member on your site), but if your homepage is just a header image, your latest posts will appear below the header. As more posts are added, the homepage will be updated with a list of all posts, from newest to oldest.
If you select that your homepage should display a static page, ![]() the background image will remain the same and posts will usually appear below the home page static image.
the background image will remain the same and posts will usually appear below the home page static image.
When this option is selected, you will be able to choose which of your pages (if previously created) will be your post page.
Select Posts Page and a drop-down menu  with all your pages will appear. Like the homepage, this separate page selected will display all the latest posts on your website. See the image below.
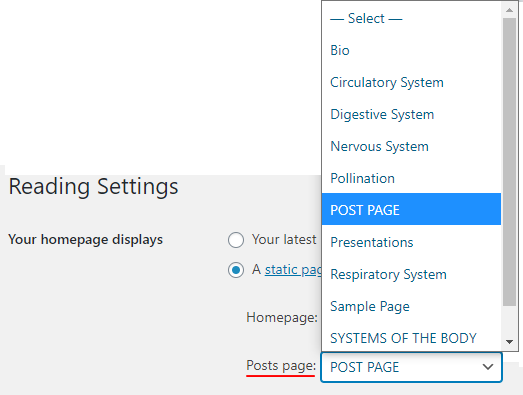
In the sample image above, a page was created with the title POST PAGE and this page was selected as the place to display all the latest posts. – click HERE to see how to create a page.
The post page was then added to the main menu of website, which is shown in the image below – click HERE to see how to add a page to your menu
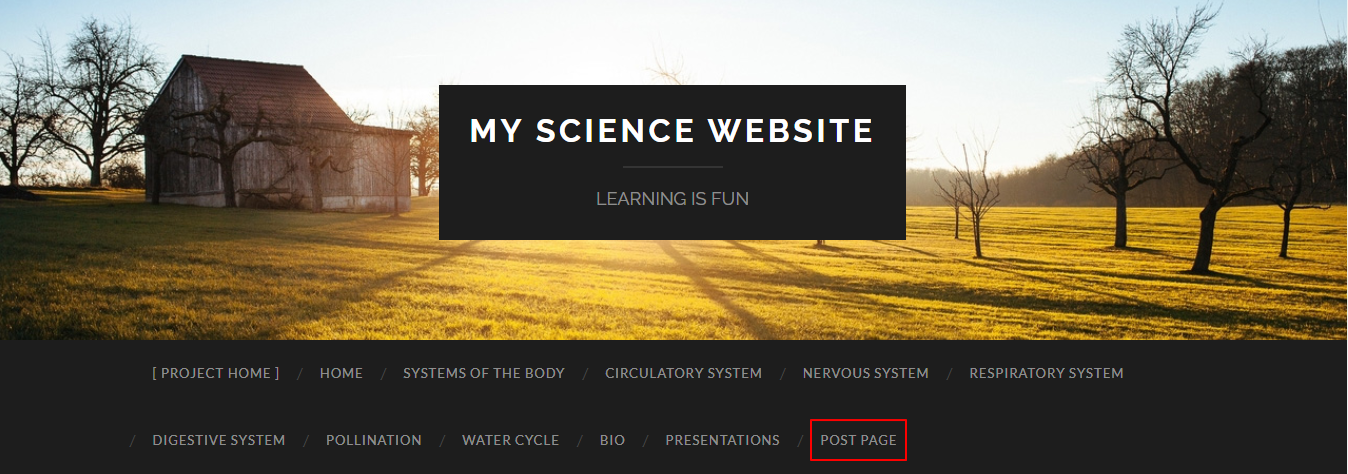
With the Hemingway theme, the page selected will just appear under the header image. For other themes which include the liquido and fluida theme, latest posts will be displayed on the posts page and also below the static image on the homepage. If it is that you want no posts to appear on your homepage and all posts appear on the page which you selected as the posts page, arrangements can be made to facilitate this upon request.
To add members/students to your site so that they will have permission to make a post CLICK HERE
There is flexibility with the location of your latest posts, whether they should be displayed on your homepage or on a separate page; it’s all up to you. Remember we are just here to assist, we encourage the use of other resources to help in making your website yours.
Adding a member/student
To add a member/student to your page, so that they will able to add a post, You need to first ensure that they are signed up at https://unewhavendh.org/. The instructions to sign up are shown HERE

From your project home select Membership, then select Invite New Members at the top of the page.
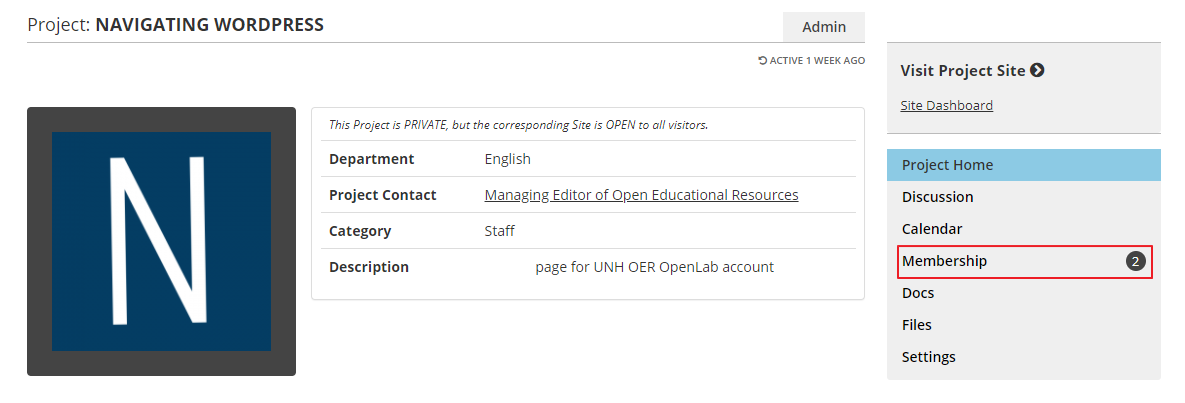

Then you will able to search for the member/student that you want to add. If this student already has an account use the Search for Community Members to invite them to your project:
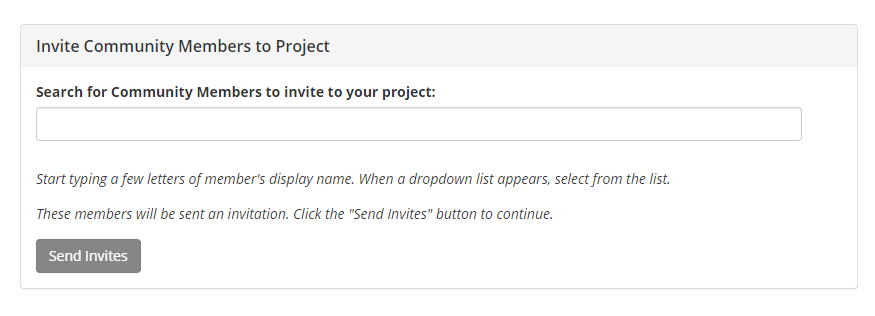
If this student does not have account, select Invite New members To This Community; this is shown in the image below

After the option to add new members is selected, you will be able to add up to five (5) members at a time, using their University of New Haven e-mails.

After the e-mails are added, you will be able to add a custom message and select the site or sites that you want these members to be added to. After this, select Send Invites located at the bottom left corner of your page; this is displayed below.

After send invites is selected, students will be sent an invitation to their e-mail. Please ensure that both their inbox and junk mail is checked for this email
To check if students are added, go back to the membership page and here a list of all members will be displayed. There is the option to Kick & Ban a member, promote to mod or admin or remove this member from the group.

